Monday, 25 February 2013

100!

Passed a milestone this weekend with my 100th sale at English Rose Vintage! Thank you so much to everyone who has bought, favourited, treasured or simply popped in to take a look around. This lovely starburst brooch - sale 100 - is wending it's way to a  new home.
 
 
And we have the perfect excuse to pop open a bottle of something fizzy ...
 
Thank you!

Sunday, 24 February 2013

New Look

I hope you like the new look.

It may have taken me about five hours but I finally have a new banner for my English Rose Vintage shop on Etsy, a new avatar and updated looks for my Twitter account and this blog. Phew!

I've wanted a more cohesive look for a while but thanks to a new book I picked up yesterday (How to Sell Your Crafts Online by Derrick Sutton) I've been inspired to get on with it. So far so useful!

Sunday, 17 February 2013

Work in progress

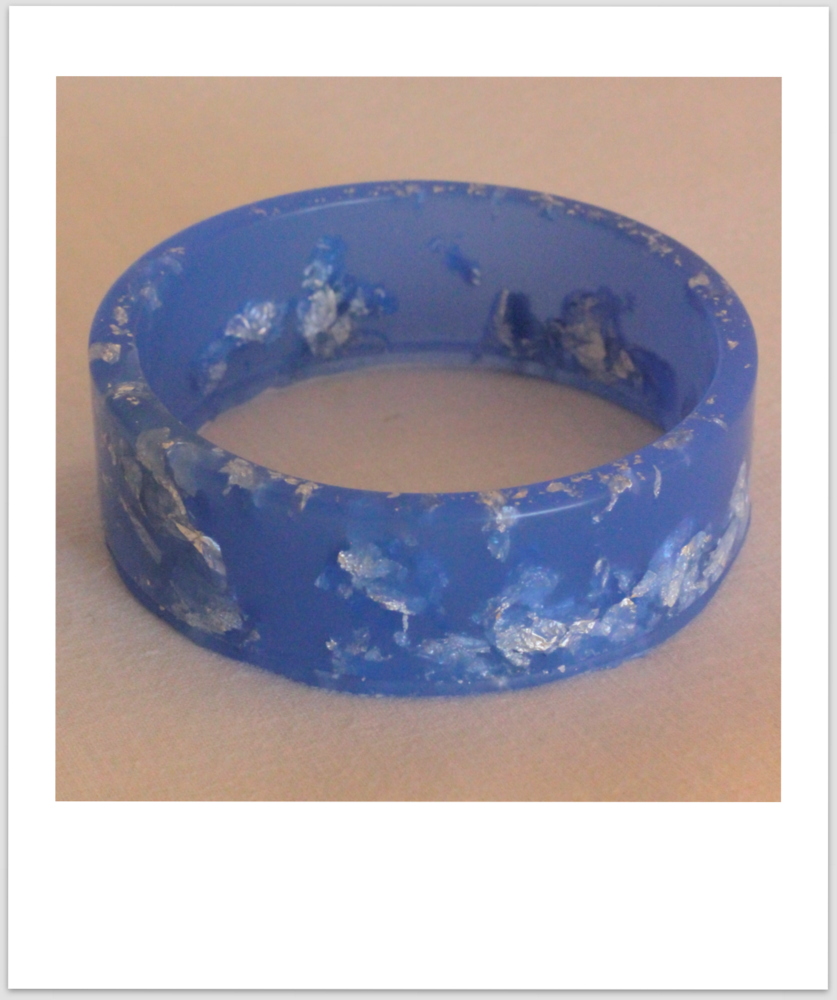
Gosh I've been a very poor blogger lately. I apologise for my lack of communication but much of my spare time has been taken up teaching myself how to make resin jewellery. From some uninspiring beginnings I am at last creating things that I love.


These are my latest bangles - waiting to be sanded and finished.


The clear greeny coloured one was made from a mould I bought on Etsy but the blue ones are made from my own silicone moulds made using vintage bangles.


I love this lavender blue colour and the simple shape of the bangle. I've made these using bio-resin, which is sourced as a co-product or from waste streams of other industrial processes and has a significantly reduced carbon footprint than other types of resin.


I've been experimenting with suspending real gold and silver leaf in the resin and love the results this is giving. 
 
 
I have a lot more to learn and my next challenge is to polish the rough edges to a shiny finish. By the end of the evening I hope to have something I can wear to work tomorrow!

Sunday, 20 January 2013

Happy New Year!

Well, I know there has been a bit of a hiatus in my blogging since way before Christmas so it's high time that I picked up where I left off. I hope you all had a good break, if you had one. We had a lovely long holiday at home and it was tough going back to work in January. The Etsy shop was busy with sales up to Christmas - much to my surprise - so I was kept busy wrapping and posting vintage goodies across the world. Now I need to find the time to list some more of my vintage treasures. I've got some wonderful things stashed away so more on those later.
 
In the meantime I've found myself becoming hooked on a new craft. I have plans afoot for a new Etsy shop, provided my experimentation works out ok! I'm having lots of fun but there's a lot to learn. I'll tell you more about this as we go - for now I'll just say it involves a lot of mixing, colouring and gold leaf. Such fun!
 
Hope all those in good old blighty are enjoying the snow - take care on those icy roads and pavements and remember to feed the little birdies!

Monday, 19 November 2012

Craving Chocolate

I had really big chocolate craving on the weekend and was inspired by my favourite blog, Posie Gets Cozy by Alicia Paulson, to try out this recipe for chocolate brownies. They were everything I wanted - easy to make, quick to cook and deliciously chocolatey.
 

This is my version of the recipe - I do own a set of 'cups' for measuring American style but I've converted some of the other ingredients into metric for those who, like me, find it easier to follow.
 
120g butter
100g dark chocolate broken into small pieces
1 cup granulated sugar
1/2 tsp salt
2 eggs straight from the fridge
1/2 cup flour
few drops vanilla essence
 
Preheat oven to 170C (Gas 3, 325F). Grease and line an 8" square cake tin with parchment and set aside. Melt the butter gently in a saucepan and when hot remove from the heat and add the chocolate. Stir once and leave 'til the chocolate has melted. This doesn't take long and you can prepare the cake tin while you're waiting if you like. Stir the chocolate and butter mix until smooth and then beat in the sugar and salt (I tipped the chocolate into a bowl before doing this but you can use the saucepan if it's big enough). Then beat in the eggs one at a time. Mix in the vanilla if using and then add the flour. Mix until the flour is thoroughly incorporated. Tip the mix into the tray and bake for 30 minutes. I found the timings to be perfect and a skewer put into the middle came out clean. Leave the tin to cool on a wire rack and then remove from the tin. Dust with icing sugar and cut into 16 small squares.
 

These were sooo scrummy - particularly the corners with that lovely combination of chewy gooey centre and slightly crisp edges. I'm afraid they didn't stick around long...
 
 
I'm thinking that next time I'll add some toasted hazelnuts for nutty chocolate heaven!

Tuesday, 6 November 2012

Baby it's cold outside

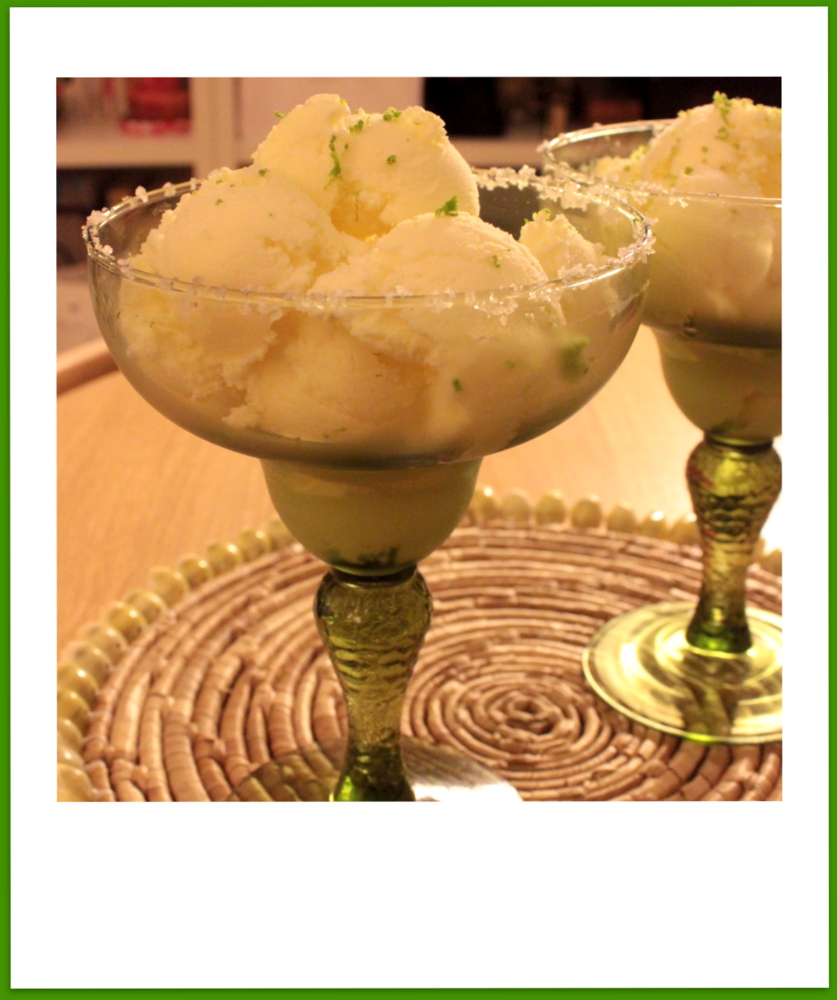
It may be cold outside but on the weekend we had a go at making ice cream for the first time. We've always been fans of Margaritas so this recipe for Margarita ice cream  (from Nigella Express) sounded right up our alley. It was as simple as pie to make and positively scrumptious to eat!


Margarita Ice Cream
 
125ml lime juice
2 tablespoons Tequila
3 tablespoons Cointreau or Triple sec
150g icing sugar or powdered sugar
500ml double cream
 
Pour the lime juice, Tequila and Cointreau (or triple sec) into a bowl and stir in the sugar to dissolve. Add the double cream and softly whip until it is thick and smooth but not stiff. Spoon this into an air tight container and freeze overnight. There no need to churn it and it won't freeze too hard.
 
We found it was delicious served in Margarita glasses with salted rims (run a lime around the top of the glass to moisten and then dip in coarse sea salt) and a smattering of grated lime zest on top. Wow. Who cares if it's cold outside when you can put the heating up high and eat this. 


Sunday, 28 October 2012

Season of Mists and Festive Sprucing

As the Autumn has descended on us, all flurries of bronzed leaves, gentle mists and surprise gusts of wind that leave my curly hair looking a bit more 'Russell Brand' than 'Pre-Raphaelite goddess', I've begun nesting and home-making like I really am about to hibernate for the winter. Bathroom and now bedroom have been given 'the treatment' (clear out junk, tidy, clean, re-arrange stuff, put up pictures - generally prettify) and this afternoon it's the living room's turn - it's the biggest and messiest room so I may need fortifying mugs of hot chocolate to get through it.
 
I'm not sure everyone gets it (everyone = the man who shares my life) but simply moving stuff around, putting up a new picture or trimming a shelf with old lace brings a fresh new perspective for me. I do like things to look attractive and I'm usually too lazy to do anything about it but occasionally I get the urge to perk things up. The coming Christmas celebrations and long break from work (yippee) always brings on a burst of enthusiastic sprucing - the thought of being at home for a long stretch is heavenly but being at home when everything's looking just a little different than normal is a feast for the eyes and feels like a true holiday in someone else's beautiful home. I'm likely to revert to my usual slovenly self for the rest of the year.
 
I've been rooting through my old box of lace trims and ribbons whilst doing all this and thought I would share this simple lampshade makeover with you.
 
 
In the bedroom I have two Ikea lampshades with barrel-shaped cream shades that I've had for many years. I like their simplicity but as I'm feeling a little more romantic and in need of 'pretty' for the winter I've given them a temporary makeover that can easily be removed or changed when I feel the need. This is the 'before' shot:
 
 
This is the after shot. (It did take a little longer than the two minutes shown on the clock - but not much - I have two shades and this is one I made earlier!)
 
 
And this is the very simple 'how to':
 
 
Using some of the large lace trim that I'd already decorated the metal frame of the bed with, I simply wrapped a strip around the middle of the shade, making sure that a little was hanging below the bottom.
 
 
I then wrapped a piece of contrasting lace around the top part of the shade, making sure that a little of the scalloped trim peaked above the top of the shade.
 
 
As these lamps sit on our bedside tables and can't be seen from behind, I have simply held the pieces of lace in place at the back with a little blue tak - no stitching or gluing needed. If you wanted to make it permanent, simply tuck in the edges to neaten and attach with small dabs of glue to the shade. With a temporary fix though you can change the look using different trims and ribbons whenever you feel like it.
 
 
To hold everything in place and create a smart finish, tie a length of ribbon (black in this case) around the join of the two pieces of lace. My ribbon was thick so I used a simple double knot but a bow would also look nice. Trim the ends of the ribbon after it has been tied and you're happy with the way it looks. Finally, I've used a pair of sparkling clip-on earrings attached to the middle of the knot to finish the lampshades off - a vintage brooch or dress clip would look good too.


Et voila! A simple change to create a more romantic and coordinated look. If you frequent car boot sales and thrift/charity shops be on the look out for plain lampshades as they can easily be given a makeover - without any technical know-how - to match your room. 
 
Happy sprucing everyone!