Showing posts with label photography. Show all posts

Saturday, 24 May 2014

Dyrham Park


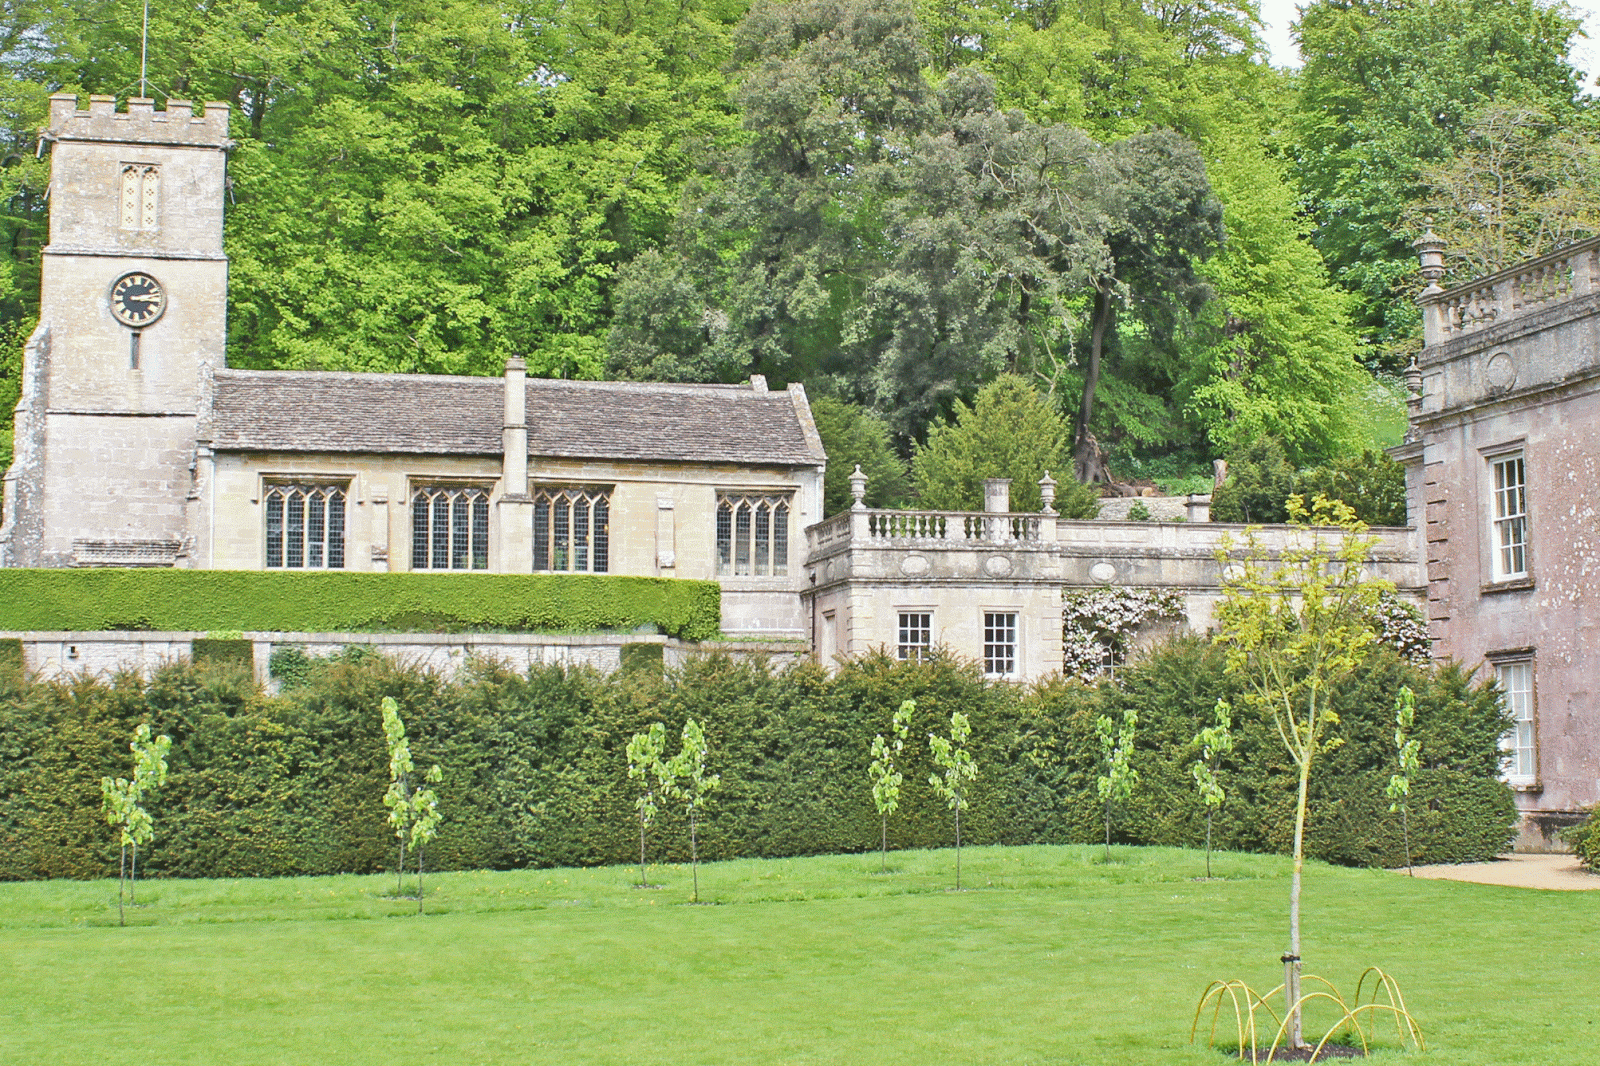
We recently visited the beautiful house and grounds of Dyrham Park in Gloucestershire, where I took these photos. In a lovely setting, the house sits at the bottom of a grassy slope. Deer wander around the grounds and the formal gardens are really pretty and well looked after. We heard, as we were being driven back up the slope in the little free bus, that the house was built at the bottom of the slope so that water from the spring at the top of the hill could be piped down into large tanks and provide water on tap - a rarity at the time. 

My favourite rooms were the Victorian kitchens and the cool dairy, covered in blue and white Delft tiles, where they believe the butter for the household was made. The orangery was also delightful - light streaming in the windows and fruit trees lined up - it was a tranquil spot to sit and contemplate.

And those topiary hedges at the front of the building certainly made us smile. Lovely face on the left but is that a bottom on the right too? I think we'll be going back often to explore the gardens more, maybe picnic by the lake and have some more of their lovely cake.

Take care people,
Melanie

Saturday, 6 July 2013

Love Sardinia

Howdy peeps!
We've just returned from two weeks on the sunny Mediterranean island of Sardinia exploring the archaeological sites, lazing on the beautiful beaches, eating the local delicacies and supping cocktails in floor length summer dresses (me, not my husband).


Such a stunning island and so much to see and do - I would highly recommend it! 


I've also been a busy bee updating the About page on my English Rose Vintage Etsy shop and would love to know what you think about it. You can take a look at the new page here. Feedback is most welcome!

Take care,
M


Sunday, 17 February 2013

Work in progress

Gosh I've been a very poor blogger lately. I apologise for my lack of communication but much of my spare time has been taken up teaching myself how to make resin jewellery. From some uninspiring beginnings I am at last creating things that I love.


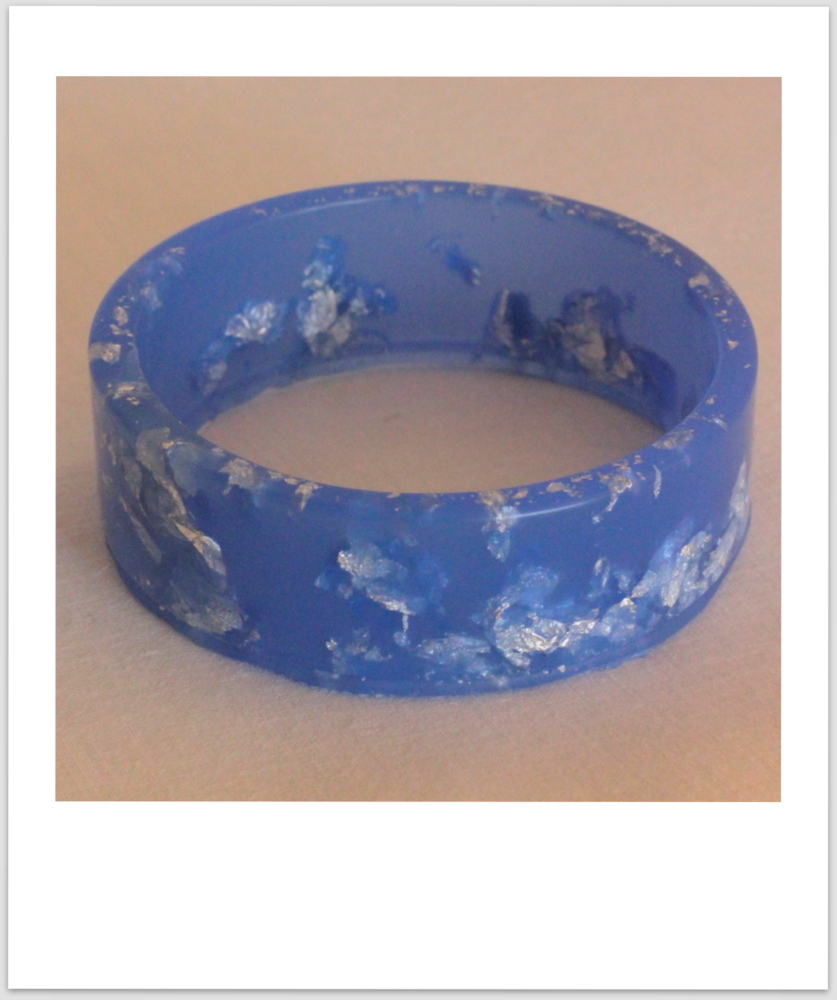
These are my latest bangles - waiting to be sanded and finished.


The clear greeny coloured one was made from a mould I bought on Etsy but the blue ones are made from my own silicone moulds made using vintage bangles.


I love this lavender blue colour and the simple shape of the bangle. I've made these using bio-resin, which is sourced as a co-product or from waste streams of other industrial processes and has a significantly reduced carbon footprint than other types of resin.


I've been experimenting with suspending real gold and silver leaf in the resin and love the results this is giving. 
 
 
I have a lot more to learn and my next challenge is to polish the rough edges to a shiny finish. By the end of the evening I hope to have something I can wear to work tomorrow!

Tuesday, 6 November 2012

Baby it's cold outside

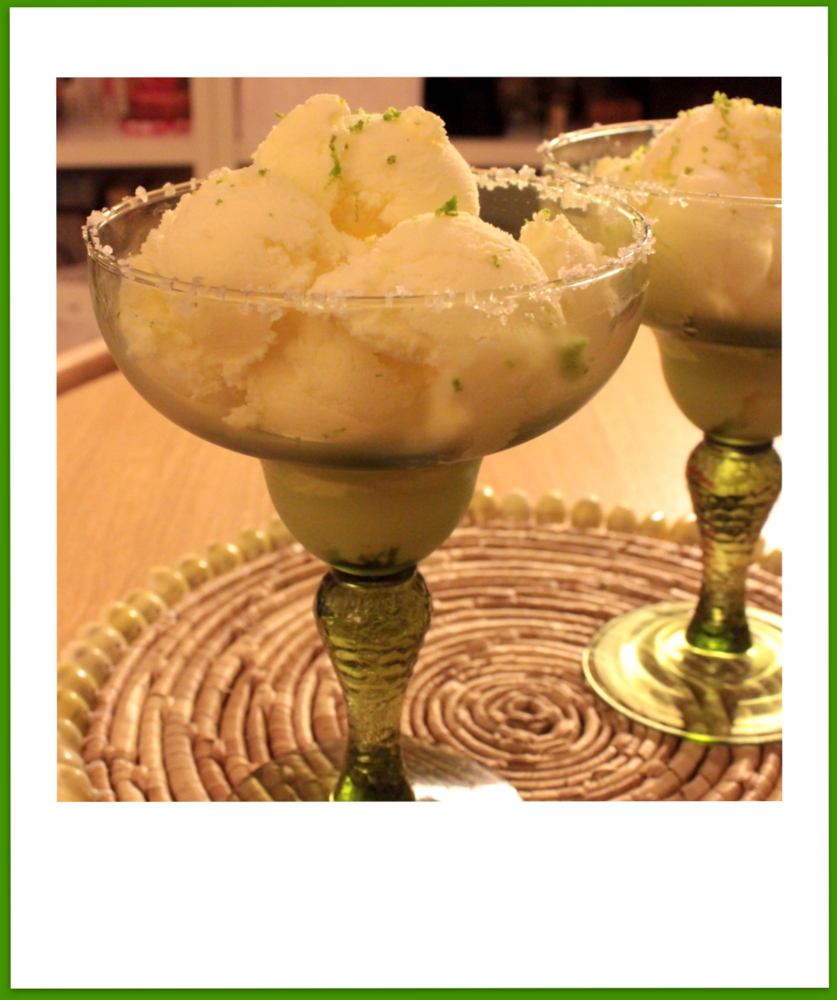
It may be cold outside but on the weekend we had a go at making ice cream for the first time. We've always been fans of Margaritas so this recipe for Margarita ice cream  (from Nigella Express) sounded right up our alley. It was as simple as pie to make and positively scrumptious to eat!


Margarita Ice Cream
 
125ml lime juice
2 tablespoons Tequila
3 tablespoons Cointreau or Triple sec
150g icing sugar or powdered sugar
500ml double cream
 
Pour the lime juice, Tequila and Cointreau (or triple sec) into a bowl and stir in the sugar to dissolve. Add the double cream and softly whip until it is thick and smooth but not stiff. Spoon this into an air tight container and freeze overnight. There no need to churn it and it won't freeze too hard.
 
We found it was delicious served in Margarita glasses with salted rims (run a lime around the top of the glass to moisten and then dip in coarse sea salt) and a smattering of grated lime zest on top. Wow. Who cares if it's cold outside when you can put the heating up high and eat this. 


Sunday, 28 October 2012

Season of Mists and Festive Sprucing

As the Autumn has descended on us, all flurries of bronzed leaves, gentle mists and surprise gusts of wind that leave my curly hair looking a bit more 'Russell Brand' than 'Pre-Raphaelite goddess', I've begun nesting and home-making like I really am about to hibernate for the winter. Bathroom and now bedroom have been given 'the treatment' (clear out junk, tidy, clean, re-arrange stuff, put up pictures - generally prettify) and this afternoon it's the living room's turn - it's the biggest and messiest room so I may need fortifying mugs of hot chocolate to get through it.
 
I'm not sure everyone gets it (everyone = the man who shares my life) but simply moving stuff around, putting up a new picture or trimming a shelf with old lace brings a fresh new perspective for me. I do like things to look attractive and I'm usually too lazy to do anything about it but occasionally I get the urge to perk things up. The coming Christmas celebrations and long break from work (yippee) always brings on a burst of enthusiastic sprucing - the thought of being at home for a long stretch is heavenly but being at home when everything's looking just a little different than normal is a feast for the eyes and feels like a true holiday in someone else's beautiful home. I'm likely to revert to my usual slovenly self for the rest of the year.
 
I've been rooting through my old box of lace trims and ribbons whilst doing all this and thought I would share this simple lampshade makeover with you.
 
 
In the bedroom I have two Ikea lampshades with barrel-shaped cream shades that I've had for many years. I like their simplicity but as I'm feeling a little more romantic and in need of 'pretty' for the winter I've given them a temporary makeover that can easily be removed or changed when I feel the need. This is the 'before' shot:
 
 
This is the after shot. (It did take a little longer than the two minutes shown on the clock - but not much - I have two shades and this is one I made earlier!)
 
 
And this is the very simple 'how to':
 
 
Using some of the large lace trim that I'd already decorated the metal frame of the bed with, I simply wrapped a strip around the middle of the shade, making sure that a little was hanging below the bottom.
 
 
I then wrapped a piece of contrasting lace around the top part of the shade, making sure that a little of the scalloped trim peaked above the top of the shade.
 
 
As these lamps sit on our bedside tables and can't be seen from behind, I have simply held the pieces of lace in place at the back with a little blue tak - no stitching or gluing needed. If you wanted to make it permanent, simply tuck in the edges to neaten and attach with small dabs of glue to the shade. With a temporary fix though you can change the look using different trims and ribbons whenever you feel like it.
 
 
To hold everything in place and create a smart finish, tie a length of ribbon (black in this case) around the join of the two pieces of lace. My ribbon was thick so I used a simple double knot but a bow would also look nice. Trim the ends of the ribbon after it has been tied and you're happy with the way it looks. Finally, I've used a pair of sparkling clip-on earrings attached to the middle of the knot to finish the lampshades off - a vintage brooch or dress clip would look good too.


Et voila! A simple change to create a more romantic and coordinated look. If you frequent car boot sales and thrift/charity shops be on the look out for plain lampshades as they can easily be given a makeover - without any technical know-how - to match your room. 
 
Happy sprucing everyone!

Saturday, 29 September 2012

Remembering


This week we are returning to the Yorkshire Dales, our home for several years before we had to move back to the south of England three years ago. Lots of old memories, both happy and sad, will no doubt be stirred up but most of all we will be thinking of little TD, who sadly died a year ago this month. We had lots of fun with him when we lived in Yorkshire and here's a few pictures taken at his first Christmas with us (he was about 8 yrs old). He got so excited unwrapping his little red jumper and he looks so smart in it! The winters were bitter cold up in Yorkshire and we think he appreciated the bit of extra warmth.

Hope you all have a happy week - the Etsy shop and blog will be back up and running when we get back.