Saturday, 23 March 2013

Easter Favours

The weather outside is frightful but inside it's delightful! I decided to cheer myself up amidst this winter snap by making up some Easter favours that will soon be wending their way to my nearest and dearest. Why not try making some of these yourself? Simple to make, they will surely cheer the hearts of those you love on Easter Day.


These Easter bundles made from vintage fabrics and doilies are tied up with various buttons and bows. Fill them with your favourite Easter chocolate or other goodies!
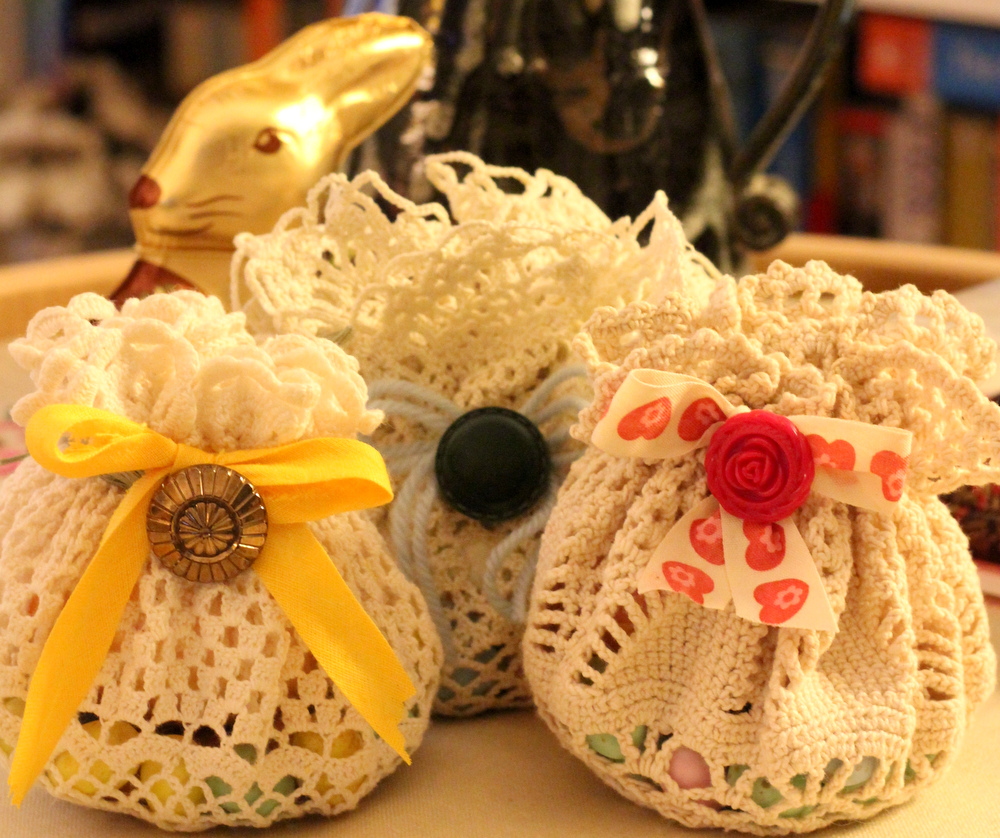
 
Vintage doilies make lovely dolly bags by simply threading ribbon through the holes, gathering them up neatly and tying off with a lovely bow. Adding a vintage button finishes them off nicely.
 

Alternatively, cut large circles of vintage fabric with crimping shears (using a plate as a template) and tie with ribbon, raffia or lace, and more lovely buttons.
 
 
I will shortly be taking some time off work (yippee) and amidst a frenzy of Spring Cleaning (I feel one coming on) may even get a chance to do some more listing in the shop and experimenting with resin. Hope your Easter is totes amazeballs folks!
 

Saturday, 16 March 2013

Get some inspiration

Spent a very full day listing new Vintage Inspiration kits and smaller trim and button kits in the English Rose Vintage shop today. I've also begun listing a whole bunch of vintage buttons and there are more to follow very soon.

Here's a little taster of what is already in the shop. Have a lovely weekend!

Monday, 25 February 2013

100!

Passed a milestone this weekend with my 100th sale at English Rose Vintage! Thank you so much to everyone who has bought, favourited, treasured or simply popped in to take a look around. This lovely starburst brooch - sale 100 - is wending it's way to a  new home.
 
 
And we have the perfect excuse to pop open a bottle of something fizzy ...
 
Thank you!

Sunday, 24 February 2013

New Look

I hope you like the new look.

It may have taken me about five hours but I finally have a new banner for my English Rose Vintage shop on Etsy, a new avatar and updated looks for my Twitter account and this blog. Phew!

I've wanted a more cohesive look for a while but thanks to a new book I picked up yesterday (How to Sell Your Crafts Online by Derrick Sutton) I've been inspired to get on with it. So far so useful!

Sunday, 17 February 2013

Work in progress

Gosh I've been a very poor blogger lately. I apologise for my lack of communication but much of my spare time has been taken up teaching myself how to make resin jewellery. From some uninspiring beginnings I am at last creating things that I love.


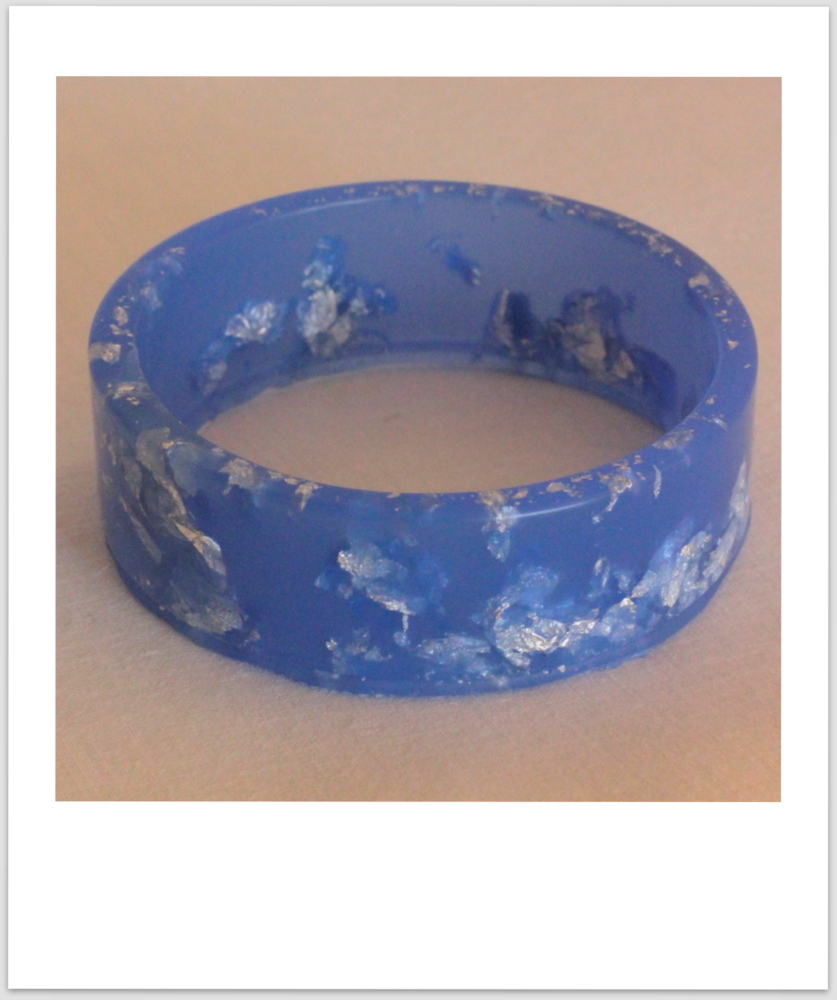
These are my latest bangles - waiting to be sanded and finished.


The clear greeny coloured one was made from a mould I bought on Etsy but the blue ones are made from my own silicone moulds made using vintage bangles.


I love this lavender blue colour and the simple shape of the bangle. I've made these using bio-resin, which is sourced as a co-product or from waste streams of other industrial processes and has a significantly reduced carbon footprint than other types of resin.


I've been experimenting with suspending real gold and silver leaf in the resin and love the results this is giving. 
 
 
I have a lot more to learn and my next challenge is to polish the rough edges to a shiny finish. By the end of the evening I hope to have something I can wear to work tomorrow!

Sunday, 20 January 2013

Happy New Year!

Well, I know there has been a bit of a hiatus in my blogging since way before Christmas so it's high time that I picked up where I left off. I hope you all had a good break, if you had one. We had a lovely long holiday at home and it was tough going back to work in January. The Etsy shop was busy with sales up to Christmas - much to my surprise - so I was kept busy wrapping and posting vintage goodies across the world. Now I need to find the time to list some more of my vintage treasures. I've got some wonderful things stashed away so more on those later.
 
In the meantime I've found myself becoming hooked on a new craft. I have plans afoot for a new Etsy shop, provided my experimentation works out ok! I'm having lots of fun but there's a lot to learn. I'll tell you more about this as we go - for now I'll just say it involves a lot of mixing, colouring and gold leaf. Such fun!
 
Hope all those in good old blighty are enjoying the snow - take care on those icy roads and pavements and remember to feed the little birdies!

Monday, 19 November 2012

Craving Chocolate

I had really big chocolate craving on the weekend and was inspired by my favourite blog, Posie Gets Cozy by Alicia Paulson, to try out this recipe for chocolate brownies. They were everything I wanted - easy to make, quick to cook and deliciously chocolatey.
 

This is my version of the recipe - I do own a set of 'cups' for measuring American style but I've converted some of the other ingredients into metric for those who, like me, find it easier to follow.
 
120g butter
100g dark chocolate broken into small pieces
1 cup granulated sugar
1/2 tsp salt
2 eggs straight from the fridge
1/2 cup flour
few drops vanilla essence
 
Preheat oven to 170C (Gas 3, 325F). Grease and line an 8" square cake tin with parchment and set aside. Melt the butter gently in a saucepan and when hot remove from the heat and add the chocolate. Stir once and leave 'til the chocolate has melted. This doesn't take long and you can prepare the cake tin while you're waiting if you like. Stir the chocolate and butter mix until smooth and then beat in the sugar and salt (I tipped the chocolate into a bowl before doing this but you can use the saucepan if it's big enough). Then beat in the eggs one at a time. Mix in the vanilla if using and then add the flour. Mix until the flour is thoroughly incorporated. Tip the mix into the tray and bake for 30 minutes. I found the timings to be perfect and a skewer put into the middle came out clean. Leave the tin to cool on a wire rack and then remove from the tin. Dust with icing sugar and cut into 16 small squares.
 

These were sooo scrummy - particularly the corners with that lovely combination of chewy gooey centre and slightly crisp edges. I'm afraid they didn't stick around long...
 
 
I'm thinking that next time I'll add some toasted hazelnuts for nutty chocolate heaven!